Monday, February 28, 2005
Tegatana Usage During the Tegatana Dousa
I’ve been very carefully watching the deshi who lead warm-ups at Shodokan and have come to some useful conclusions about how to better use your tegatana (hand sword) during the practice exercise called the Tegatana Dousa.
The key point has to do with the hand position when it is above the head. The correct position is with the blade vertical and pointing towards the sky while the curve of the thumb mimics the curvature of your head. Furthermore, the part of the thumb closest to the head is only about 4-6 (8 to 12 centimeters) inches away from the head. The hand at this apex position is more or less directly above the top of the head. To then make a forward strike, the elbow extends.
Let me go through the five Tegatana Dousa exercises in order.
#1. Here, think of there being two separate strikes. The first is a downward sword cut, which will work as described above, with the cut ending at about your chin level. The second is an upward sword cut. But since we are doing these exercises to improve not our swordsmanship but our un-armed aikido, make sure that as you pull back with your tegatana, you point the fingers down as far as they naturally go. (If someone grabbed your wrist, pointing the fingers downward would greatly facilitate pulling them off balance.) Your upper arm should be flush with your chest as you pull back, and your fingers should be pointing down. (Please note that your forearm should not be touching your torso, due to the natural curvature of the tegatana arm. Given the curvature, if your upper arm is touching your chest, your lower arm would be able to touch anything—unless your belly is really big.) When you move forward with your feet and raise your tegatana blade from this position, stop at about your chin level.
#2. Here the interesting thing to note is that your upraised hand as you move from the left side strike to the right side strike (and vice versa) moves slightly behind your head. That is, you thumb should be pointing vertically downward, behind your head, as your hand and arm pass above your head to move from striking on one side to the other.
#3. Here, nothing new to report. Just keep in mind big circles and don’t bend your elbow. Also, make sure both thrusts (circular to outside, circular to inside) finish directly in front of your center line.
#4. Not much new to report. But do make sure you turn the full 180 degrees and that your armpit is shut as you pivot.
#5. Here, again, make sure that your hand is directly above the top of your head as you do the strikes--especially on the latter two. Before you move forward, get the hand over the middle of the top of your head. Then strike. This ensures you are centered throughout despite the fact that your torso is turning 90 degrees or so as you strike.
Friday, February 25, 2005
A New Look
Just gave the site a slightly modified look. It was fun to use my HTML skills again a bit. Thanks to WYSIWYG editors, I hadn't hard coded any HTML in a long, long time.
If you scroll down a bit, you'll also find some permanet link ads I posted to books and a DVD . They're all for sale at Amazon.com.
If you scroll down a bit, you'll also find some permanet link ads I posted to books and a DVD . They're all for sale at Amazon.com.
Thursday, February 24, 2005
The Dai San Kata's Sword on Sword Techniques
What is called Tomiki Aikido in the west has several sets of sword-on-sword techniques (that is, where both people who are practicing are armed with swords). The one most commonly practiced is part of the Koryu Dai San no Kata (the Third Collection of Ancient Techniques).
I’ll describe some of the details I’ve learned here at Shodokan dojo.
There are eight of these techniques. Their proper names are given in Dr. Loi’s book Tomiki Aikido. I’ll do my best to name them here correctly, but don’t take my names as definitive. (Also, please realize that most of the practitioners in Japan also just refer to them by number. For instance, “This is the fourth technique in the sword-on-sword set from the Dai San.”)
With the exception of the eight technique, each technique begins from 6 steps back from sword-tip-to-sword-tip distance. That is, start at sword-tip-to-sword-tip and each person take three steps back. You then each take three steps forward to begin each technique so that they are all done very dynamically.
1st. Shomen Uchi (Top of the Forehead Strike)
Here, I have no great advice except to say that you really cut down nearly perfectly vertically at hour opponent’s forehead. The tip of your sword only ever so slightly tips to the right so that you deflect his sword cut (which is also vertical coming right at your forehead) before you land your own strike. (Obviously, don’t actually hit him as you are practicing.)
2nd. Migimen Uchi (Right side of the Forehead Strike)
The trick here is that as uke tries a shomen uchi against you and you taisabaki to your right to avoid it before striking back, you move into migi hanmi (right foot forward half stance). You do NOT move into ordinary upright migi gamae (right foot forward stance.) This has several advantages. First, there is less movement, so you are quicker. By going into migi hanmi, you only barely get out of the way of the strike. Second, there is more extension. Since in migi hanmi your are leaned a bit forward, with your bodyweight mostly over your right foot, you can extend your arms (and, thus, the sword tip) farther horizontally than you could if you were standing upright in a right-foot-forward stance. As you strike, you aim for uke’s right side temple (That is, the right side from your view. To him, it’s his left temple.)
3rd. Hidarimen Uchi (Left side of the Forehead Strike)
Here again, you go into hanmi. But since the taisabai is to the left, you go into hidari hanmi (left foot forward half stance). You are just barely off of the line of uke’s shomen uchi strike. And as with the previous technique, you get a lot of advantages by being in hanmi rather than going into a regular, upright, left-foot-forward stance.
4th. Nodo ni uchi (Throat Strike)
This name I’ve given the technique is most certainly wrong. Look to Loi Sensei’s book for the correct name. Here, uke again goes for a shomen uchi, but while he’s raising his sword up, you slide in and threaten to poke him in the throat. To do this, you rotate the blade so that it is pointing up. Just turn both of your hands clockwise 180 degrees. The hilt of the sword then rests atop of your right forearm, and you slide forward abruptly with both feet to put the point of the blade within an inch or two of uke’s throat.
You now have uke trapped. You can easily kill him by poking a couple of inches ahead. Furthermore, even if he tries to strike downward and move back at the same time in order to try to strike you while avoiding your throat poking, he faces the prospect of cutting off one of his own arms since your blade is pointed up. As he strikes down, all you would have to do would be to duck a little while raising the blade. He would likely lose a hand if he swung down with any great force.
You next walk a couple of steps forward to indicate you have full control over uke (who quickly backs up so that his neck doesn’t become a blood fountain for vampires). You then turn the blade back to downward facing while raising it up so that it is a couple of inches in front of uke’s left forearm (his right side arm from your perspective). This also would mean that if he swung down, he’d cut off his own arm. You then back away from each other.
5th. Doh! (Chest Strike)
In kendo, a lateral strike to the torso is called a do (pronounced the same as “dough”). Here you will strike uke with a do as he tries to strike you with shomen uchi. The timing is important. You must slide into a right foot forward stance and to the side just as he is bringing the sword down. Don’t go too far to the side. Just enough to make sure he can’t hit any part of your body. At the same time, you strike across his chest; from your perspective, your sword swings from left to right. Keep moving. You take several slides forward, all in a right-foot forward stance. This is the equivalent of leaning in to him with your body weight to really slice his chest open.
As you pass him, it will be hard to hold on to the sword with both hands, as it will be pointing back and to your left as you pass near him and keep moving forward. Consequently, open up your left hand (the one near the end of the sword handle). The fingers and the thumb make a tegatana and the shaft of the handle rests in the V formed by the index finger and the thumb. After the tip of the sword has passed uke, you can regrip in the normal way as you point the sword tip in front of you again, like normal.
6th. Kote (Gauntlet Strike)
Kote is the Japanese word for gauntlet (the heavy defensive glove worn by an armored swordsman.) In Kendo, a kote strike is a wrist area strike. Here, you and uke move forward until your sword tips are almost touching. Then, almost imperceptibly, you bait him. You tip your sword tip down just a little so that he has a line for a kote strike. When he comes in for it, you deflect his strike and do a kote counterstrike against him. At shodokan, this happens really quickly. You walk toward each other, tip your sword, and then go into the strike-counterstrike very quickly. You do not walk up, pause to build up tension for a moment, and then bait him by tipping your sword down (which is how I learned to do it.)
7th. Kaeshi Men (Counter Strike to the Forehead)
Here, you and uke walk towards each other in the normal way (three steps each). So the rhythm is 1-2-3. But you take an extra long time with your 3rd step. Uke strikes with a shomen uchi on 3. He thinks that you are in synch.
But you do not move with him. For you, the third count is very long. You wait for his sword to almost hit you before turning the blade up to block, and then switching your stance from right to left to go into hidari hanmi (left foot forward half stance) for the counter strike to (from your perspective) the left side of uke’s forehead. (After you block, the sword tip swings around to your right, behind your head, before coming around your left side to strike at uke’s head.)
The long third count is the key to doing this technique correctly, and ads the appropriate reality. Only by getting uke to really commit to the downward strike (which you do by appearing to be slow and not getting up a defense early) will you be able to take advantage of his full commitment to block and counterstrike safely.
8th. Kumi Tachi (Swords Moving In)
This fun kata is a short duel with multiple strikes. I’ll only describe it briefly since it is very complicated and you pretty much have to have done it anyway for any sort of description like this to make sense. You begin sword tip to sword tip. You then take four steps/slides forward. What is the difference between a step and a slide? In a step, the forward foot changes. In a slide, both feet move forward but the same foot stays in front. The fist movement is a slide.
Since you start in a right-foot forwards stance, you slide both feet forward. Then you step forward. That puts you into a left-foot-forward stance. Then you step again, into a right-foot forwards stance. And then you step again, into a left-foot forward stance. That’s four slides and/or steps for you in total.
In the mean time, uke backs up ONLY three steps. He starts in a right foot forwards stance. When you take that initial slide forward with your right foot, he backs up by stepping backward, into a left-foot-forward stance. Then when you take your first step (into a left foot forward stance) he backs up again with a step, putting him into a right foot forward stance again. And then when you take your third step/slide (into a right foot forward stance), he steps back again, into a left foot forwards stance. Notice that at this instance, you are in opposite stances but at proper distance.
You then bait him by pulling your sword up to hold it vertically with the handle held by your right shoulder while stepping forward that fourth time with your left leg. But doing that final step, your leg is closer than proper distance and a prime target. You are using it as bait, begging him to strike at it. And so he does (after also going to hold the sword vertically by his own right shoulder, which you can see in the Loi book).
From here, I have no interesting details, except that every time you block, your armpits should be closed and your elbows pulled back against your chest for extra strength. It is assumed that uke will thrust/strike with his body weight behind each blow--so you must be in a really strong stance with your arms well attached to your torso to take the blows. The final strike (the coup de grace) is to the neck, not to the head.
Tuesday, February 22, 2005
Sword Techniques of the Koryu Dai San no Kata
Tomiki Sensei wanted to get to the essence of things. So he cut down the 2,000 plus aikido techniques to a small set of core techniques. The full set of 2,000 can be viewed as that core plus variations on the core.
Meanwhile, Ohba Sensei liked to catalogue old techniques. That is how we got the six Koryu no Kata (collections of old techniques). The third set is the basis of the first, second, and third degree black belt tests in what is now referred to in the west as Tomiki Aikido. (In Japan, there is no style name. The organization is the Japan Aikido Association, and the head dojo is Shodokan.)
Let me go over some things I learned recently about the sets of techniques called tachi dori (literally, “grabbing the sword,” but actually meaning disarming a sword wielding opponent when you are unarmed) and tachi tachi (literally, “sword sword,” but meaning that both you and your opponent have a sword). They are part of the Koryu Dai San no Kata (the third collection of old techniques).
For those of you not familiar with these techniques, I refer you to Loi Sensei’s book, Tomiki Aikido.
Tachi Dori
There are five of these techniques where a sword wielding opponent (tachi) attacks you when you are unarmed. In each of them, you take the sword away from tachi. I’m going to describe them all assuming that tachi is right handed and standing in a right foot forward stance. Since he’s right handed, his right hand will be farther away from his body when holding the sword.
To begin the first technique, uke takes a vertical sword cut (somen uchi) at you. As you taisabaki to the right your right tegatana cuts down at tachi’s forward wrist (right wrist if tachi is right handed). You then push forward and move your right foot forward maybe six inches as you grab the sword between tachi’s hands. That gets an initial kuzushi. Be sure to grab from underneath and then rotate the hilt forward as you throw. To set up the throw, you slide your left leg behind you, staying low. You do NOT push way up in this technique. Everything stays under tachi’s shoulder level. You turn till you are almost facing the same direction as tachi and then push forward while rotating your wrist to throw. Uke goes over the little toe of his right foot. (He was in a right foot forward stance the whole time.) You keep the sword as they take a forward roll.
For the second technique, uke again attacks with shomen uchi. Do your taisabaki to the left and cut down on uke’s forward (right) wrist with your left tegatana. Next, use your left tegatana to push in and down at uke’s elbow. Your blade should fit right in the crease of the bent elbow. As you do this, slide the left foot forward so you can push on the arm with your full body weight to bend the elbow. As you are doing that with your left hand, the right hand grabs the hilt between uke’s hands. You then pivot to your right and do shiho nage (tenkai kote gaeshi). Make sure not to poke yourself with the sword. (Uke should turn with the shihonage so that they can take a forward roll rather than a backfall.) You keep the sword as the fall.
For the third technique, tachi is going to poke at your throat with a strait tsuki (stab). As he does this, his arms and the blade should all be parallel to the floor, at his own shoulder level. The key thing to understand about this technique is that you are doing hanmi (half-stance) for the taisabaki. As you move to the left and turn out of the way of the thrust, do not turn your hips a full 90 degrees. Only go into left-foot forward hanmi. Your left hand goes up vertically (as if you were taking the oath in a court of law) as you do the taisabaki. The blade should miss you by only a couple of inches because you don’t really get off line, you just do hanmi. You then bring your right hand up and over as a tegatana and hit uke square in the head. And I do mean square. Your tegatana blade should split him in two, right down the middle of his face. (Uke obviously leans back when you practice this so as not to get his nose smashed.) And actually, for this technique, uke keeps the sword as he falls. The idea, though, is that he is unconscious. If you were to land this blow, he most definitely would be.
For the fourth technique, tachi from his perspective cuts diagonally from top left to bottom right. It is a kiri-kaeshi (a diagonal sword cut). Move forward as torii and block with your left foot forward and with your left tegatana. Your tegatana should block in the middle of tachi’s right forearm. Also, crucially, block with your own forearm, with contact about two to three inches below your wrist. That matters because if you then relax your wrist, it naturally drapes over tachi’s forearm—meaning that you can easily pull on the forearm—as you do next. Pull and move to your own right, pivoting to your left as you do so. This will spin tachi around and you can quickly slide your left hand up under his elbow so that you can then push forward and throw him with oshi taoshi. He lets go of the sword as he goes into the fall.
For the fifth and final technique, when uke cuts straight down (shomen uchi), do a left taisabaki, going into a left-foot forward hanmi. Your left hand comes down over uke’s right (forward) wrist. Then grab the hilt between uke’s hands with your own right hand as you step forward with your right foot. Squeeze the sword towards yourself, using your right hand to pin it on your right hip. Next do something very complicated. (Or at least complicated for me to describe!) Take your left hand and snake it between uke’s two arms. It should go over his right arm (the closer one to you), under your own right arm (the hand of which is grabbing the hilt) and then come to rest palm-up just beyond the sword’s tsuba (hand guard). In particular, place the palm-up hand so that the back of it is touching the top (dull side) of the sword blade. Typically, it’s hard to reach so far and only the back side of your hand by the thumb will be touching the top of the sword. As you do all that complicated insertion, your hips will naturally turn a bit to the right. Once the hand is in, you turn back to the left (i.e. towards uke) and pull up while rotating the blade vertical (that is, the tip goes down and threatens to cut tachi’s groin in two). Tachi falls backward, his wrist having been locked, and the blade now threatening him. As he falls, he lets go of the sword
Monday, February 21, 2005
A Nice Stiff Tegatana
A key point I’ve learned on this trip is that uke must provide a certain amount of realism in his use of tegatana (hand sword). In particular, if you are attacking with it, it should be stiff. If you attack with a limp arm, your “strike” would be ineffective. So to mimic a real attack, your arm should be stiff when you strike (or thrust) with it.
This ends up creating a lot of great kuzushi opportunities for torii. In particular, if uke’s tegatana arm is stiff, it can be used as a lever to break uke’s balance.
Indeed, this is true throughout the atemi waza. For instance, in shomen ate, after being attacked and stepping to the side you should push firmly down on uke’s attacking tegatana arm. If uke is properly keeping a stiff tegatana, it will serve as a lever that will push him off balance (forward and to the right, from his perspective, if he is attacking with his right tegatana). Indeed, your right arm as you push down on uke’s wrist should cut pretty low—nearly down to the level of your own belly button. That gets great kuzushi.
Also, the downward motion is a kiri-kaeshi cut (a diagonal sword cut). It starts from your top right and cuts down at a 45 degree angle towards your left hip. Your tegatana blade should cut right into the thumb-side of uke’s tegatana wrist. That way, the fact that his hand flairs out from the wrist at that point on uke’s arm give you nice little place to apply pressure so that things don’t slide. By coming down at a 45-degree angle, you actually push (from uke’s perspective) forward on the arm as well as pushing it down. Thus, uke is (from his perspective) pulled both forward as well as pushed off to the right. You may even get his torso to rotate.
In ai-gamae ate, your first motion is to push up several inches with your own tegatana. This will raise uke’s tegatana, and make getting to the underside of his arm (to rotate it and pull on it) much easier. This is only possible if uke is keeping a stiff tegatana arm.
In gyaku-gamae ate, if uke has a stiff tegatana arm, you will be able to unbalance him a bit as you push down on it while entering. This helps to set up the ensuing throw which is made by the other arm.
In gedan-ate, the same is true. If uke’s arm is stiff, then you can both pull and push on it at various times in the technique to unbalance uke.
Finally, in ushiro-ate, the first thing you do is cut down with your own tegatana, driving uke’s lower. You can then push on his elbow to turn his torso. But again, here, a stiff tegatana on uke’s part is essential. If uke’s arm is limp when you push on the elbow, only his arm will move (articulating at the shoulder joint). But if his tegatana arm is stiff, you’ll be able to use it as a lever to twist the torso.
Sunday, February 20, 2005
Tsukuri Drills
I’ve now got the correct handle on what is meant by the word tsukuri. It means everything up to but not including the final throw or pin of an aikido technique. That is, it includes the taisabaki (avoidance) and whatever part of the technique happens to get kuzushi (breaking of balance). All of that is tsukuri.
And that makes sense since the word tsukuri means “making.” All that stuff is the making—the preparation—for the final throw or pin.
At Shodokan, they practice the tsukuri drills in a very good way. Let me tell you about it.
They do them in pairs. Take the shomen ate tsukuri drill for instance. Uke and torii stand at proper distance (ma-ai) or a little more. Uke’s legs are shoulder width apart. And then uke counts out the number one (ichi!).
At that point, torii scoots forward, leading with the same foot and hand, and slides until his tegatana (hand sword) is just below uke’s throat (or, alternatively, you can aim for the chin, so that your palm fits over the chin). Torii comes to a stop, and uke leans back just a little. That way torii can push maybe a couple of inches into the space that uke had been occupying before leaning back. (Doing this much entering means that kuzushi, breaking of balance, was achieved.)
Torii then returns to proper distance and uke shouts out two (ni!) Torii responds by performing the same initial movement to get in and break uke’s balance, but then takes another sliding step forward to throw uke.
So the deal is that on the first count, torii does the tsukuri drill making sure to cover the distance with good form. And then on the second count, torii also does the throw. In this way you never get sloppy like you do if you do ten reps where you only throw uke on the last one.
You also get much better biofeedback doing the drill in pairs in the sense that if you only throw on the tenth, you tend to concentrate on quickly covering the distance rather than preparing to throw. In particular, you get bad at getting kuzushi.
Since the whole purpose of a tsukuri drill is to get you to the point where you can throw, you should be focusing on that. And doing pairs forces you to think about it because on every other iteration you are throwing.
That being said, you don’t have to throw hard. The purpose of the drill is the tsukuri of the technique, the preparation for the throw. So don’t pound away at uke. Indeed, if you get good at the tsukuri, uke will be so off balance by the time that you get to the throw that you won’t have to push very hard at all to get him/her to fall.
You should do the same sort of practice for all the other five atemi-waza tsukuri drills. Uke counts, and then torii moves. On the first count, just to (a slight) kuzushi. On the second count, everything including the throw (but lightly).
Sunday, February 13, 2005
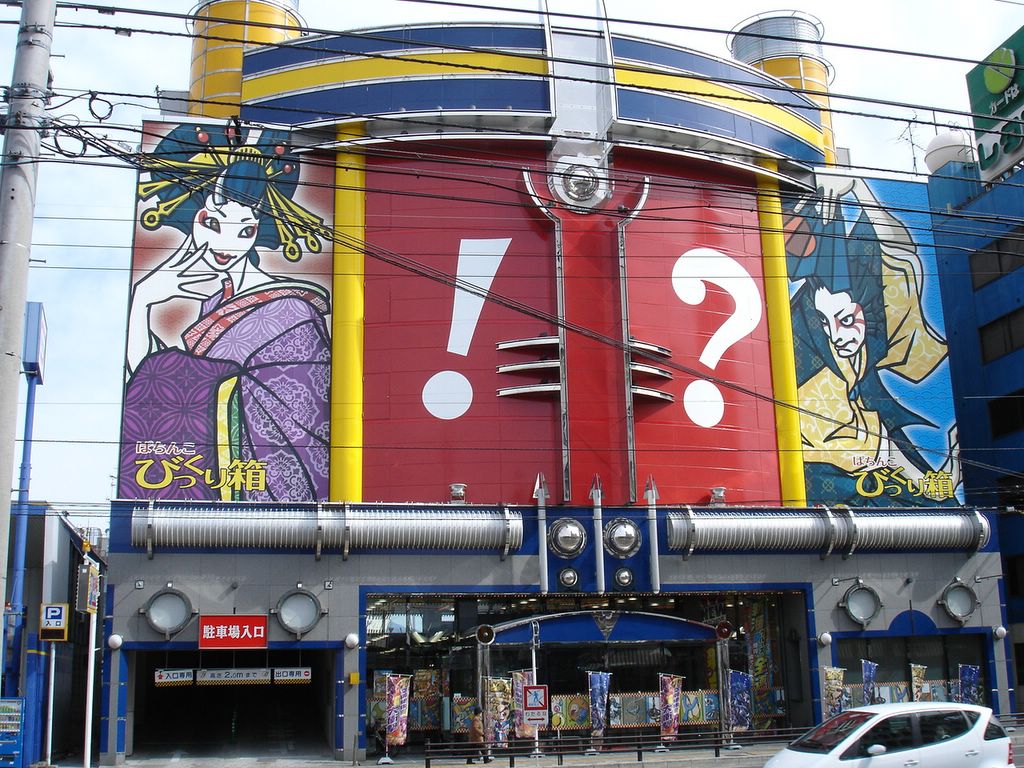
The four story facade of this gambling den manages to summarize the visceral thrills of gambling with just two symbols. As a finance guy who teaches risk preferences, I have to say this is quite pithy.


Unfortunately, the lousy economy in Japan over the last 15 years has meant a huge increase in gambling dens. Since the last time I was in my mom's home town six years ago, a rash of huge new ones with big parking lots and garish exteriors has spung up. Here's on that lies directly across the street from the town's Little League baseball park.
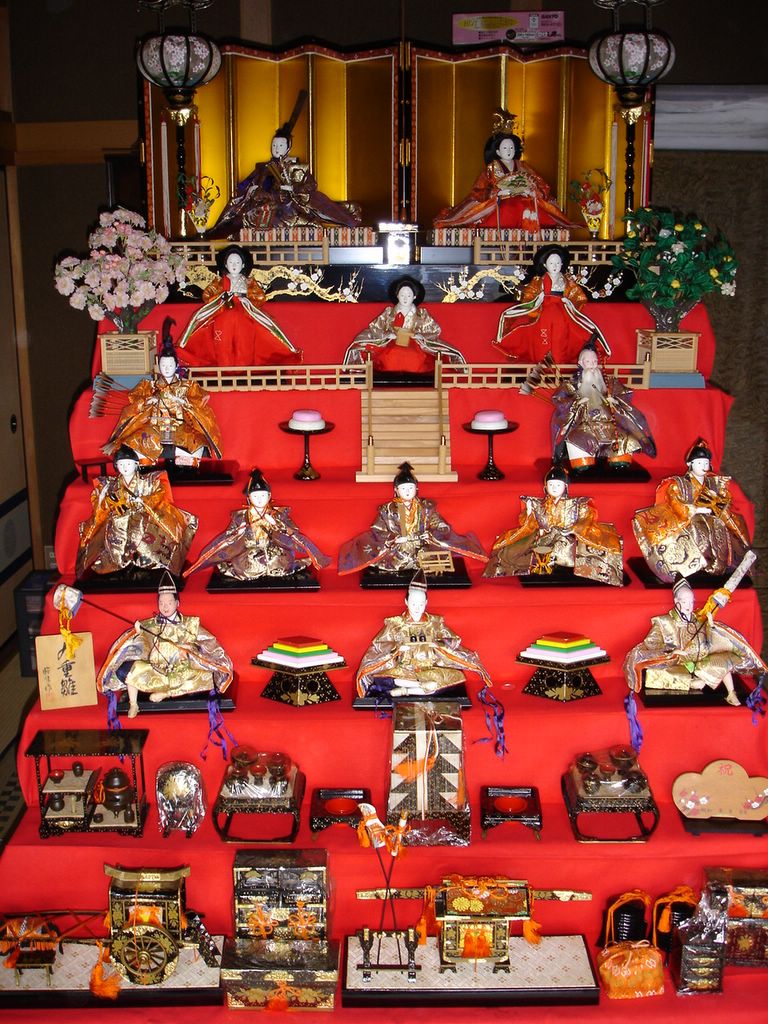
March 3rd in Japan is Girl's Day, which involves putting out a big display of dolls (hence the name, Hina Matsuri, or Doll's Festival). Some displays are bigger than others. My aunt's is huge. Believe it or not, those dolls on the top shelf are more than six feet off the floor.
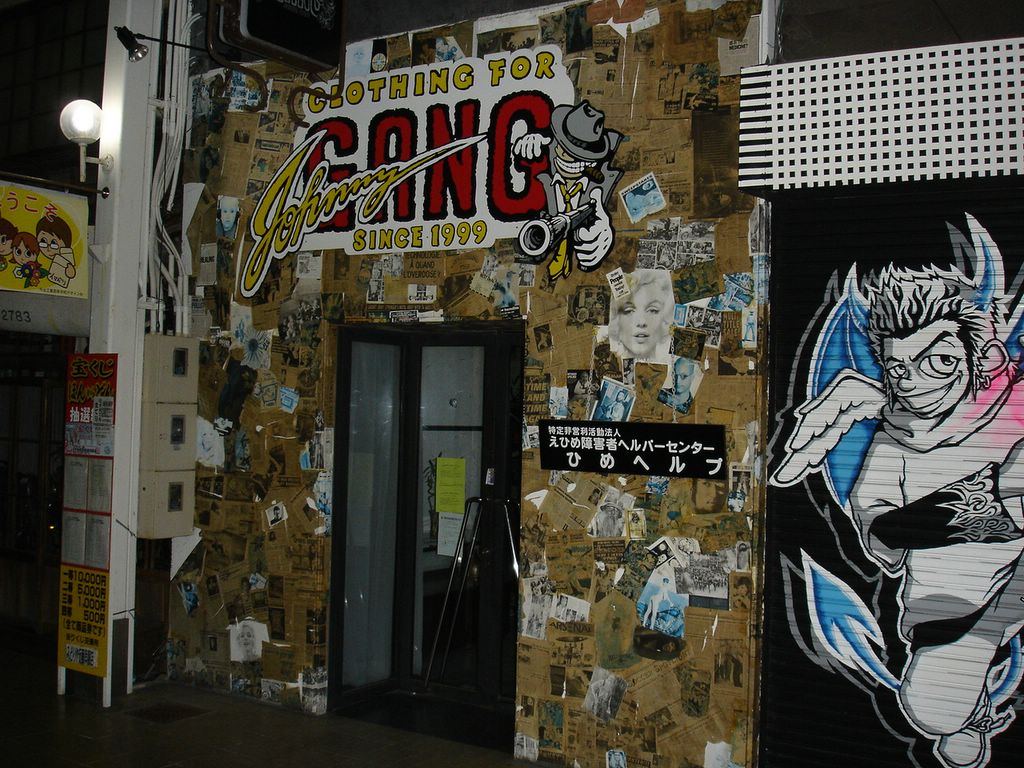
Here's a little more Americana re-packaged for small town Japan.
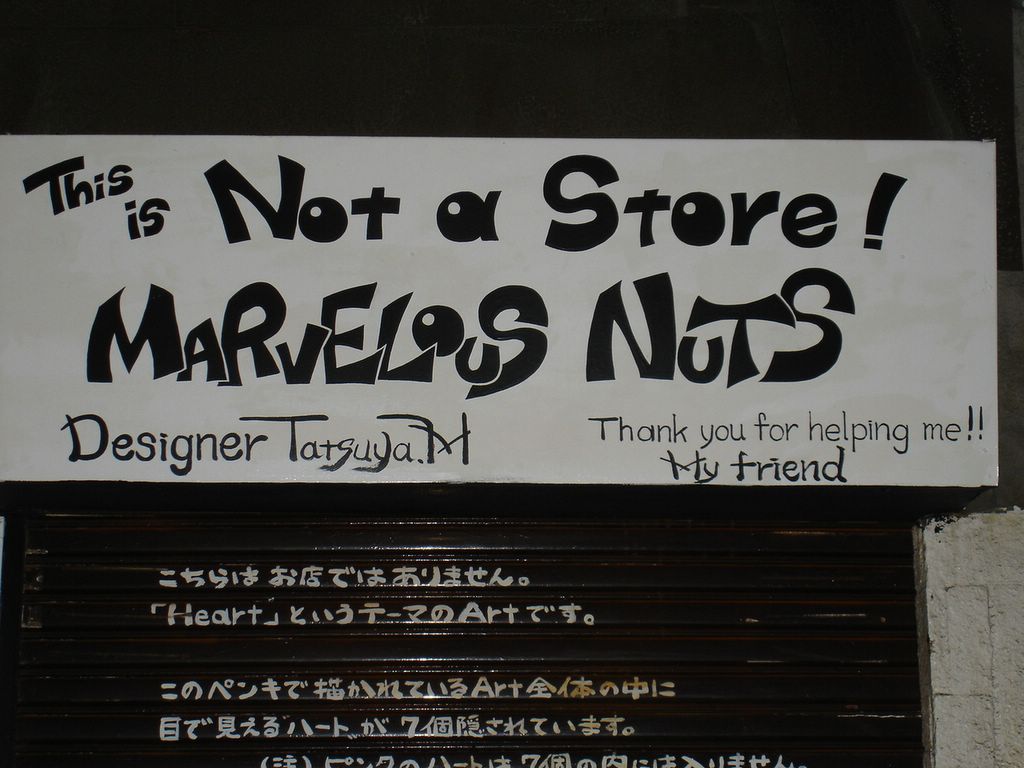
Here's a close up of part of a sign on that store in my mom's home town. (See below for the whole store front.) I was glad to find such gramatically correct English could be written by such marelous nuts.
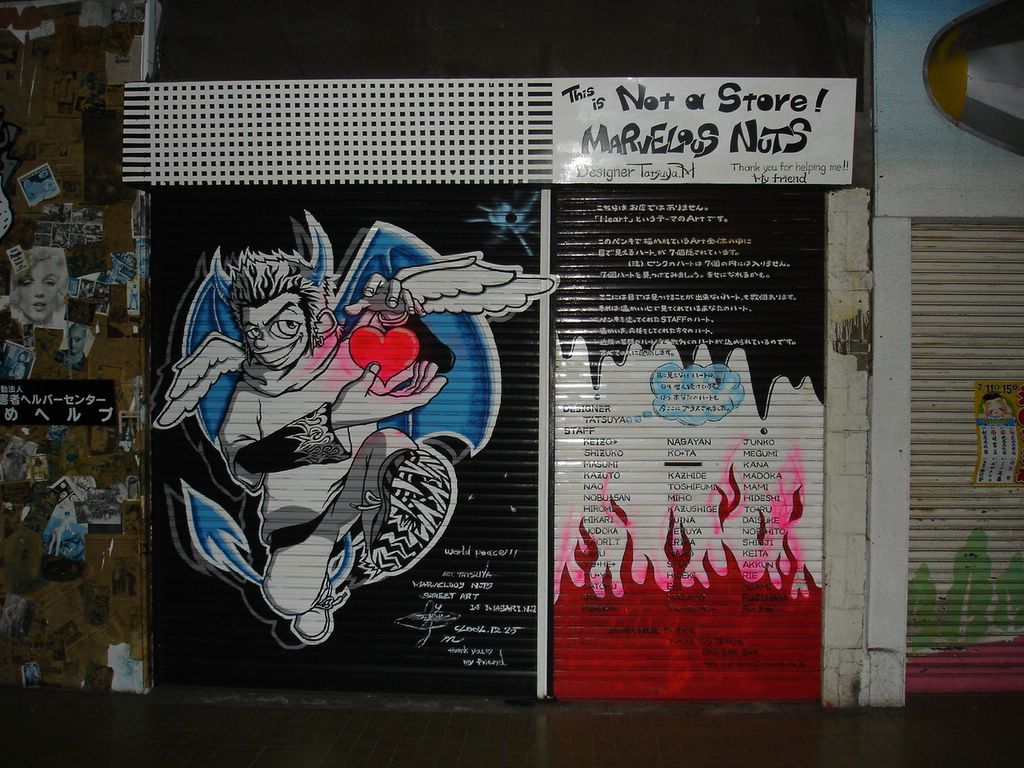
Here's the night time view of a store front in my mom's home town. Clothes for slackers. Ghetto USA re-imagined for small town Japan.
Thursday, February 10, 2005
Do Men With Shaved Foreheads Live Longer?
Yesterday I went for a haircut. But being that this is Japan, it was heavily labor intensive, highly expensive, very precise, too a long time, and featured excessive heapings of service and attention.
It’s hard to get a men’s haircut for less than about $30 in Japan. Mine was $38 plus only four more bucks for a shave. But, there’s no tipping in Japan, so the total was only $42.
Now, you can find cheaper haircuts, but less than about $18 bucks is really hard to come by. Plus, you don’t get the full Japanese treatment.
It begins with a shampoo. Yes, this is standard. Actually, I should back up. It begins with a man who takes you jacket off you and hangs it up nicely. He issues you a baggage claim ticket, too, despite the fact that the coat is never more than 5 meters away. He then walks you over to your chair, puts you in, makes light conversation, and washes you hair.
The guy who took are of me plays the six string and is a big fan of Guns N Roses and Velvet Revolver. He’s hoping to start a band soon.
My stylist then came over. Well, he’d be called a stylist anywhere else but in Japan he’s just a barber.
My hair is awful. Three cowlicks, two in one direction, one in the other. He had never seen such horror before. But to work he went and he did a very nice job.
While he was cutting and making light conversation, the manager came over. They were amused that I didn’t much fit their image of a professor. But I think I managed to convince them that I really was. Talking enthusiastically about Guns N Roses didn’t help my case.
He also mentioned that their owner and mentor now apparently runs a very expensive hair salon in Manhattan called Momotaro—Momotaro being the name of the lead character in a famous Japanese children’s story. So perhaps you can experience the full on Japanese treatment in New York, as well.
But in any event, it was now time for the second shampoo. So the jacked/shampoo guy came back and we talked about the local indie music scene while he washed my hair, and then turned the chair around to begin the shave.
Japan never freaked out about HIV like we did in the states. Straight razors are still legal. So he began with hot towels.
It is very pleasant to lie back in a big comfy leather barber’s chair while a hot, wet towel rests on your face and softens up all your wiskers.
He then remove the towels and applied the warm foamy soap. Yes, warm and pleasant. There’s no cold foam in a Japanese barber shop.
And then he shaved me. But not just the normal parts. He also did my forehead and offered to sculpt my eyebrows. But, thanks be to God, my monobrow remains intact!
He then shampooed me very lightly again to get my hair wet for the stylist guy to come back and blow dry it.
Finally, I got my shoulder rub. Yes, in Japan, they are afraid that all of this pampering might have stiffened you up. So every hair cut ends with a short shoulder rub. Very nice.
And then, with much bowing, I doffed my jacket and went on my way.
So, since Japanese men live longer and Japanese men routinely have their heads shaved, one must cogitate upon the health benefits of the perfectly smooth forehead.
A New Kaeshi Waza Sequence if You’re the Guy Stabbing
Apparently, I’ve wandered into Shodokan at a period when they’re congealing together a new kaeshi-waza (counter technique) sequence.
They haven’t yet named it, but let me tell you what it consists of.
There are seven kaeshi waza. They are meant to be done by a person stabbing as counters to sever particular aikido techniques.
In all my descriptions below, I’m going to be assuming that you are the stabber and that you are standing in a right-foot forward posture and that you are holding the knive in your right hand. As you slide forward to stab, you remain in a right-foot forward (migi gamae) posture.
#1. Hijimochi no Tsukuri countered by Weird Gyakugamae/Ushiro Ate
The hijimochi no tsukuri are a sequence of ways to grab a stabbing person’s arm. This counter technique is used against what is typically taught as the first of the hijimochi no tsukuri (which literally means the elbow grabbing movements).
In that first hijimochi no tsukuri, suppose for a second that you are being stabbed at by someone with the knife in their right hand. You slide diagonally to the left to avoid the knife. You end up turning 90 degrees so that you are square to the stabbers extended arm. You then grab their right writs with your right hand and rest your left hand, thumb pointing up, right behind their elbow. That way, when their arm pulls back after the stab, the elbow pushes right into your waiting left hand.
You then scoop up the stabbers arm, raising the elbow above the shoulder and brining their forearm vertical. Their elbow should be bent to about a 90 degree angle.
You then knock them over (hopefully) by pressing on their bent elbow with your left hand as you step forward with your left foot. This is essentially a version of oshi taoshi.
OK. Now that you know how uke is supposed to attack the stabber, imagine yourself in the roll of the stabber.
You stab, they move to your right, grab your arm and go to do the technique. From your perspective thy will be a little behind you and to your right as they push forward.
Go with the movement, moving your whole body forward. Then, as soon as it has stopped, you begin your counter.
Since their left leg is forward (and now slightly in front of you), you are in a good position to do gyakugamae ate with your right arm. But since they are holding it and it’s bent, you can’t do it in the normal way.
What I want you to imagine to see the correct position is to stand vertically, and raise your right arm straight till its flush with your shoulder and your arm is pointing directly to your right. So your arm and your torso make a 90 degree angle. Now bend your elbow 90 degrees, so that while your upper arm points directly to your right, your forearm and hand point directly forward.
That’s the position you want to be in when you push.
So you put your right foot behind uke (which is easy to do given that he’s standing with his left foot forward) raise you arm up to the position I just described and push into him and walk backwards.
It is a very strange technique in that from uke’s perspective he’s being basically walked backwards because your upper arm ends up pushed up against the upper part of his chest and left shoulder.
Walk into him and backwards, kind of sliding your feet, and uke will fall.
The rest of these descriptions will hopefully be much shorter!
#2. Hiki Taoshi countered by (8th kyu) Shomen-ate
You stab straight ahead and uke does hiki taoshi and really pulls hard. But your balance is not broken. You end up for a moment in tug of ward. But then your rotate your stabbing hand (right hand) over, slide slightly to your right to get on uke’s center line, and then slide forward, doing shomen ate against uke’s upper chest/neck/chin, depending on how he’s pulling.
The turning over of the hand is exactly like in the shomen ate of he 8th kyu (which all the older students will know. The newer students may not know it in the USA since the JAA/USA got rid of the 8th kyu. But the technique I’m talking about is still part of the Junana Hon (Basic 17) done against a single hand, matching stances (aigamae) grab. So it’s still in the curriculum.)
#3. Waki Gatame countered by Gyakugamae ate
Here you stab and uke begins to to waki gatame. Before he can get it locked in, you slide forward and throw him but doing a right armed version of gyakugamaeate. Your right arm should be across uke’s upper chest and your right leg should be behind him.
#4. Kote Gaeshi countered by Ushiro ate
Here is the infamous kote gaeshi counter. I have now learned to do it correctly, but will wait till I come back to the states to explain it in any great detail since it’s really subltle.
But what happens here is that you stab, uke moves first to your right ot get out of the way, and then grabs your arm and pushes you down and forward (onto your own weak line) to break your balanced. He then gets the butterfly grip with both hands on your right hand and goes to do kote gaeshi.
As he does and as he is raising your hand up from down low (where he pushed it to break your balance) up to it’s highest point in the arc on which he wants to move it, move into him. Push your right hand toward him. Then twist your right arm in a screwing counter clockwise motion and extend it strait out. At the same time, slide slightly forward and to your right (in a right foot forward stance, which you should have maintained from the beginning.)
If you do this correctly, you will both break out of the kote gaeshi and will also turn uke 90 degrees or more to his own left. That will mean that his back is towards you.
You then throw him with ushiro ate.
Actually, let me try to explain the key part where you twist your right arm to break the grip.
Stand up straight and then bend your right arm so that your forearm is vertical, your upper arm is parallel to the floor and your palm is facing you. Your upper arm should also be at a 90 degree angle to your chest.
Now make a fist as if you were holding a knife. And without bending any other joint but your wrist, tilt your hand toward you (as though your face were a door that you wanted to knock on.)
This would also be the position your hand would be in if someone were taking it through an nice high kotegaeshi in order to throw you.
Now let me try to describe the screwing motion with which you are to extend your arm and break out of the kotegaeshi.
Everything I’m about to describe is a bit over done, so don’t think you should use such big movements in reality.
Bend at the elbow, so that your fist comes towards your chin. Keep moving your fist in that direction down past your chin, and down your center line. Once the fist is facing the floor, start moving it away from your chest by extending your arm at the elbow and just keep on extending until your arm is straight. This is the counter clockwise screwing motion that I intended you use above.
#5. Tenkai Kote Hineri countered by Ushiro Ate
Here, again, you stab with the right hand. Uke grabs your arm and attempts to pass under your right arm to do tenaki kote hineri. The trick here is to grab him and pin him against you chest as he is turning around. After you grab him, move backwards to throw him backwards using ushiro ate.
As you pin him to your chest, his back will be to your chest and your stabbing arm will be draping down over his chest. Keep your elbow bent a bit and put your left and on his left shoulder to help to control and then throw him. A helpful thing to do is to put your right hipbone into his lower back. This will help to bend him backwards and break his posture.
You really have to be flush with uke to do this right.
Also, please not that if uke is some way away from you to your right when he tries to go under your arm to do the technique, simply slide towards him as he is turning around. This will bring you flush to him.
#6. Shihonage (Tenkai Kote Gaeshi) countered by Gyakugamae ate
Stab with your right arm. Uke will move to your left, grab your arm and begin to do pull it down and to your left in order to do shihonage (which in the Tomiki nomenclature is called Tenkai kote gaeshi).
Let him get it down and then back up to your mid chest level. And then level him with gyakugamae ate, with your right arm pushing against his upper chest or even this temple if it comes that high depending on how he’s moving.
A key point is that you should slide your arm up uke’s chest. That is, starting from when he has your arm at its lowest point, pin the arm against uke’s chest (it’ll be near his/her belly button, most likely) and then slide it up, pushing into uke’s chest the whole way.
Once it’s at the top and you want to throw, make sure you turn the blade towards uke and then push. (The blade side is the ulna bone side of the forearm.)
I say this because during the sliding up the body portion of the technique, the radius bone side (thumb side) of the forearm will be pushing up against uke’s chest. The forearm needs to be turned over before the throw.
#7. Mae Otoshi countered by Gedan Ate
Here you stab, uke moves to your left into your center and grabs your arm. He then goes to do mae otoshi. To do so, he must step forward with his left foot. That is your entrée to the counter.
As he is stepping forward with that left foot, drop your weight down onto that forward thigh (his left thigh). This will break his balance. Proceed with gedan ate to throw him.
A subtle point is that you want to suddenly twist your arm while dropping down so that you can push with the blade side of your right (stabbing) arm. That is, your elbow should be pointing towards uke. As you throw, your right arm is flush along uke’s torso and your own right side of your torso is flush against uke’s torso, too. Slide both feet as you push into him.
Ki Phrase of the Day
Ki ga shizumu literally means that your ki is sinking. And, idiomatically, it means that you are down in the dumps, blue, or melancholy.
Engrish has Gratefullness
If you don't already know about Engrish.com, please go there and have a little look around. They've got nothing but authentic pictures of hugely absued English--stuff that you find on shirts, bags, and signs all over Japan. The saddest part to me is that my Japanese is probably most of the time just as oddfull. Here is a classic.
Tuesday, February 08, 2005
Some More Kuzushi Waza Tips
Let me now describe how to do the 7th and the 14th of the kuzushi waza sequence. At shodokan, they normally practice eight of the 14 total techniques in this sequence. They practice all 7 of the omote (forward versions) and then the last of the ura. That is, they do 1-7 and 14.
Number 7 of the Kuzushi Waza
To try to make it more clear what’s going on, imagine that you and uke are standing on a north-south line. You are facing north and uke is facing south.
You are waiting in a right-foot forward stance. Uke wants to run around you and grab both your wrists, ending up standing behind you holding your arms behind you. To do so, he runs to your right side to get around you. He first grabs your right wrist with his right hand before running behind you to grab your left wrist with his left hand.
Here’s how you do the waza.
As he runs towards you, turn 90 degrees to your left while sliding a small amount forward with both feet (you remain in a right-foot forward stance.) That’s right, both feet move towards uke. This does two things. First it disrupts his timing. Second, it pulls him slightly off balance. In particular, since your right wrist moves forward when you slide forward with both feet, his grabbing you by that right wrist will tend to pull him off balance (to his own right.) But also please understand that the sliding motion is small, definitely less than a foot and more like six inches. Notice that since you turned 90 to your left, you are now facing west.
Next, you will turn 270 degrees towards your right so that you end up facing south. I have to describe this in stages since several things happen almost at once.
First, take a narrow little step forward with your left foot. It will end up just in front of your right foot, which is still facing north. It’s actually kind of a penguin step so that your left foot is facing north-east. It is important to realize that this step puts the left foot very close to the right foot. Your left foot should only be maybe four to six inches away from your right foot. By taking this step you will once again be facing north.
Second, simultaneous with taking this left foot forward step, you need to slide your left tegatana along your left hipbone and then down the inside of your left thigh towards your knee. If your timing is good, you don’t have to go very far down your thigh. What doing this accomplishes is to really pull uke off balance. Since uke’s left hand is grabbing your left wrist, the simultaneous effect of stepping forward with your left foot and sliding your left tegatana down your left thigh is to pull uke significantly off balance.
Third, also simultaneous with stepping forward with the left hand and sliding the left tegatana down the left thigh, raise your right tegatana straight up your center line. As you do this, make sure your right upper arm is flush with your torso. Your elbow should not be pointing horizontally to the right! Raise the right tegatana all the way up above your head.
Next, turn around 180 degrees. This will get you pointing south. As you turn, keep your tegatana arms stiff. By doing so, you will be able to pull uke further off balance using both arms.
Once you have turned around, slide forward with both feet, pushing through your right tegatana blade into uke’s right arm and using that pressure to move him. If you timing is good, uke will want to take a forward roll.
Also note that as you do this, you should lean with your whole body weight. Don’t just try to move uke by cutting downward with your right tegatana. Instead, use your body weight. Lean, and as uke starts to move you’ll find your right tegatana dropping down your center line rather naturally.
Tomorrow, tips on the 14the technique. But for now, yet another…
Ki Phrase of the Day
Ki ga tatsu literally means that your ki is standing up. What it means idiomatically is that you are irritable, on edge, or irascible. Even a trifling thing can send you into a rage. Think of it as equivalent to having your hackles up.
Sunday, February 06, 2005
Scoll Down!
There's a post about aikido and about the story behind these picutres if you scroll down.
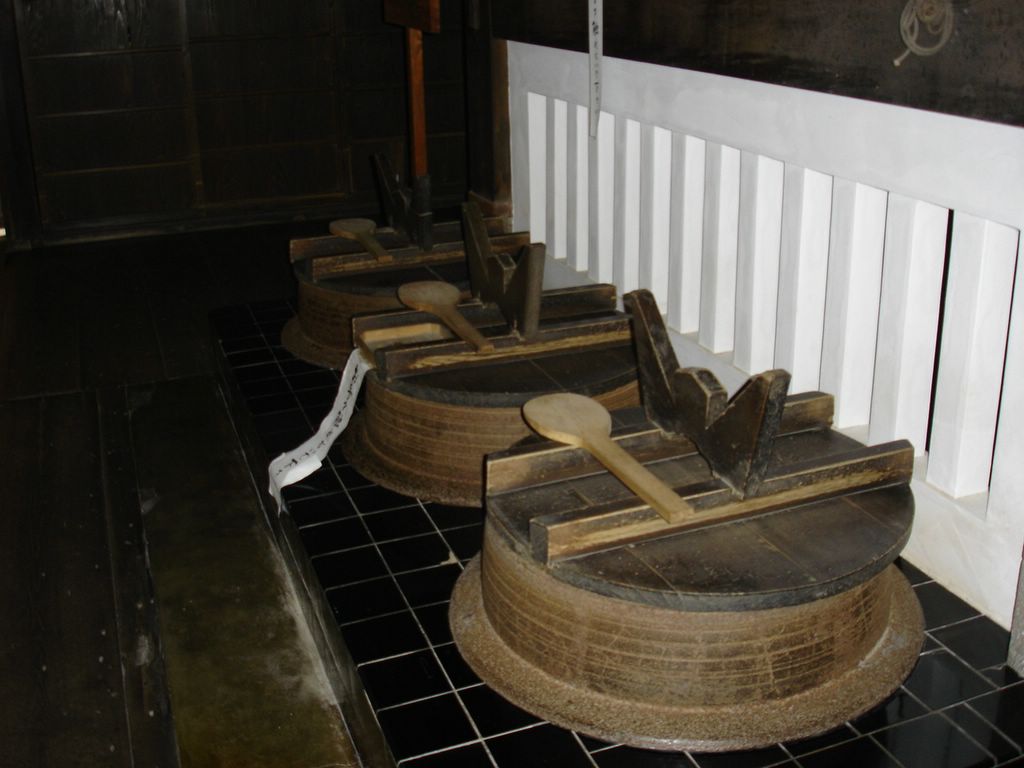
These three huge pots could cook enough rice food to feed 2,000 monks at once. The rest of the kitchen is equally impressive.
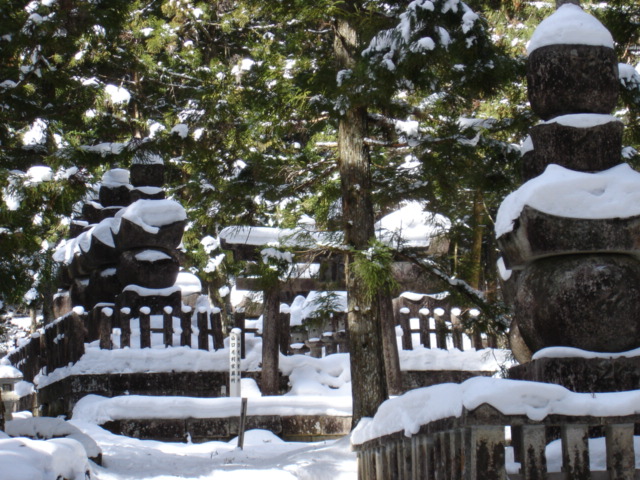
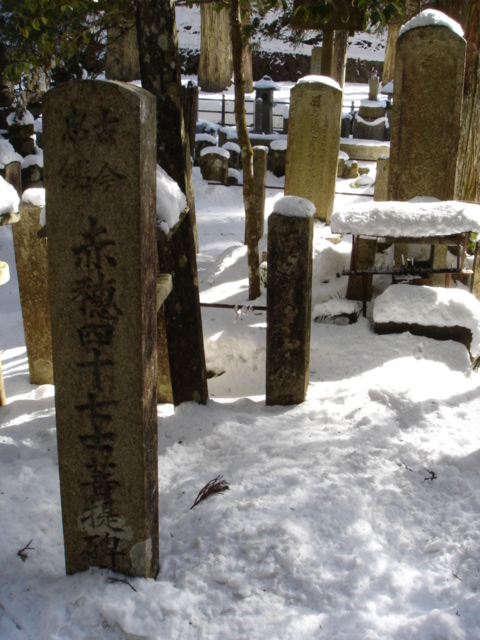
This is the grave of the ringleader of the notorious 47 Ronin. They took revenge for thier feudal lord who was unjustly forced to commit ritual suicide. He is burried only a few meters away from Kobo Daishi's shrine. A huge honor.
Most of the graveyard is up on the mountain side, in the forest. It's quite lovely.
Yes, that's a rocket in the middle. Some of the graves are very strange looking. You can have anything you want if you're willing to pay the extremely high prices necessary to be burried near Kobo Daishi's shrine.

An extremely famous garden, covered in the snow. But I liked it this way. Also, no crowds in winter.
To the left is a small rock garden, covered in snow. This hallway, though is equiped with a Nightengale floor that squeeks as you walk across it. An assassination prevention device.
Turn your head 90 degrees since I can't figure out how to make Picassa do that for you. This is in the grave yard.
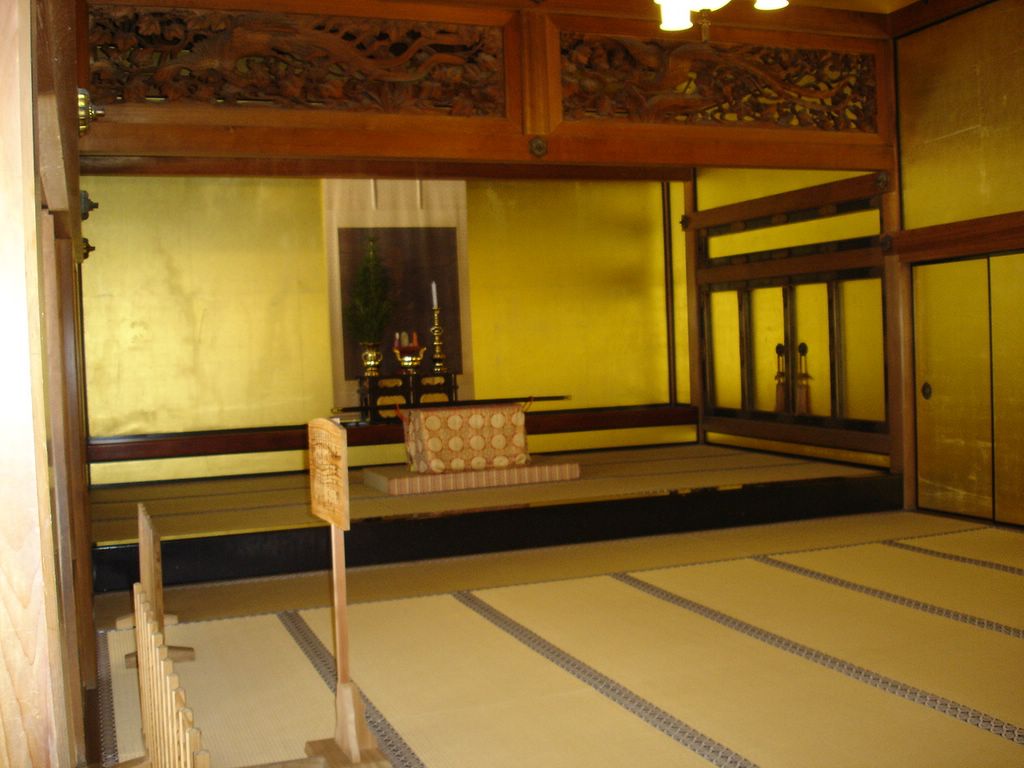
A fully gilded room for when the Emperor visited Koyasan.

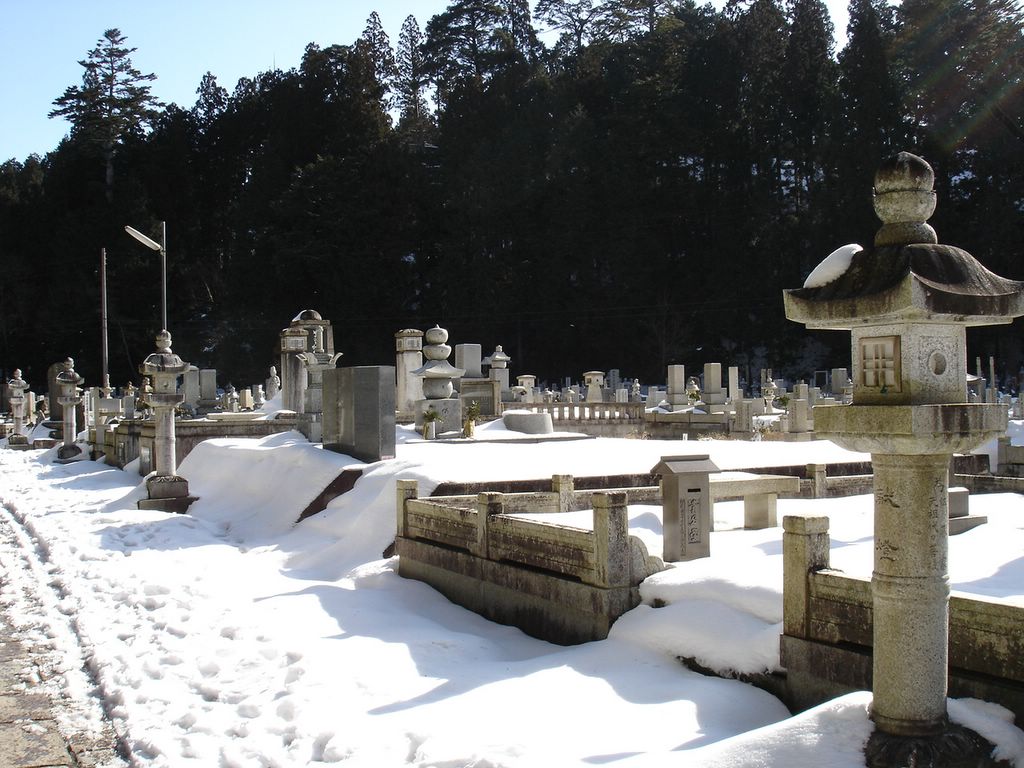

You throw water on these particular Boddhisatva (enlightened beings who decided not to go to Nirvana but instead remain here on Earth trying to help other beings get enlightened) because they do their best to help those in hell stay cool. That's Professor Jayasuria of the University of Melbourne along with our assistant at the Osaka Institute for Social and Economic research, Misayo Kuwano.
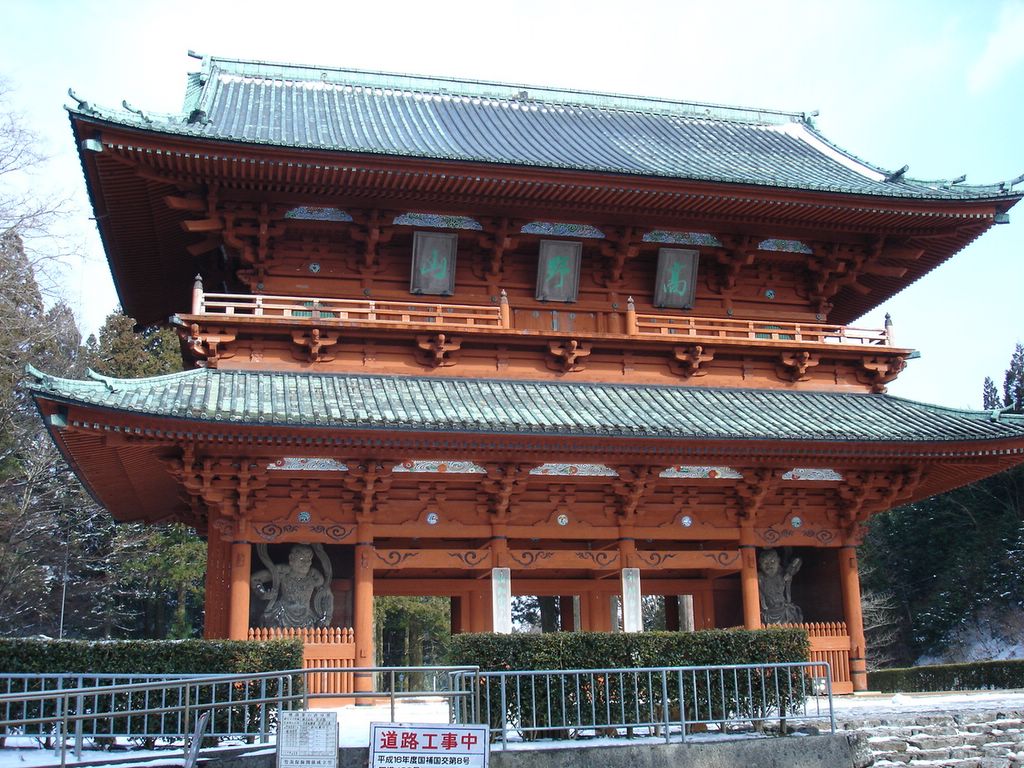
The main gate to Koyasan that greeted worshipers as they climbed up the mountains.

A close up of the cranes. Absolutely love. Paint on wood.
Another sliding door. 16th Century. It's good when old wooden temples don't burn down. (Most do every couple of centuries or so.)
Some lovely sliding doors at one of the temples at Koyasan
![]()